Air-Gap RPI-4 with Access Point
For a ready image please check Air-Gap RPI-4 Ready Image, also script is available at prepare-airgapped-server.sh
AP: DE_2025
PW: 1234567890
site: http://airgap.droneengage.com:8001/index.html
email: single@airgap.droneengage.com accesscode: test
Please refer to Authentication Server for more details on how to define users and password.
The following is how to prepare the above image using script.
Prerequisits
1- RPI-4 with RPI-4 with Raspberry OS bullseye-64. The computer should have a statis IP. The scripts assumes 192.168.1.161 put you can change this IP to any local IP you want. In case of RPI-4 you do not need to install the Desktop version. You only need to inslall the server with ssh enabled.
2- It is preferred to have a temporary wired connection on RPI to setup the script.
3- It is recommended to boot RPI-4 from a USB-3 flash memory to get advantage of higher throughtput speed.
Installation
Enter to your Raspberry-PI using ssh or open a terminal on your Ubuntu server.
cd ~

wget https://raw.githubusercontent.com/DroneEngage/DroneEngage_ScriptWiki/refs/heads/main/server_installation/prepare-airgapped-server_w_ap.sh

chmod +x prepare-airgapped-server_w_ap.sh

./prepare-airgapped-server_w_ap.sh

wget https://raw.githubusercontent.com/DroneEngage/DroneEngage_ScriptWiki/refs/heads/main/helper_scripts/create_ap.sh

chmod +x create_ap.sh

./create_ap.sh
The following folders are created on RPI
dnsmasq a DNS server that is up running and configured in /etc/dnsmasq.conf
a folder ~/droneengage_authenticator contains droneengage_authenticator
a folder ~/droneengage_server contains droneengage_server
a folder ~/droneengage_webclient contains droneengage_webclient
a folder ~/map/cachedMap that is empty. This folder can be filled with cached images to be used as a local map server.
you can edit password in ./home/pi/droneengage_authenticator/server.config
Your Raspberry PI-4 now is fully ready
Access Local Domain
Register CA Root
When the script finishs successfully the following will be created:
a folder ~/ssl with three files:
privkey.pem
fullchain.pem
root.crt
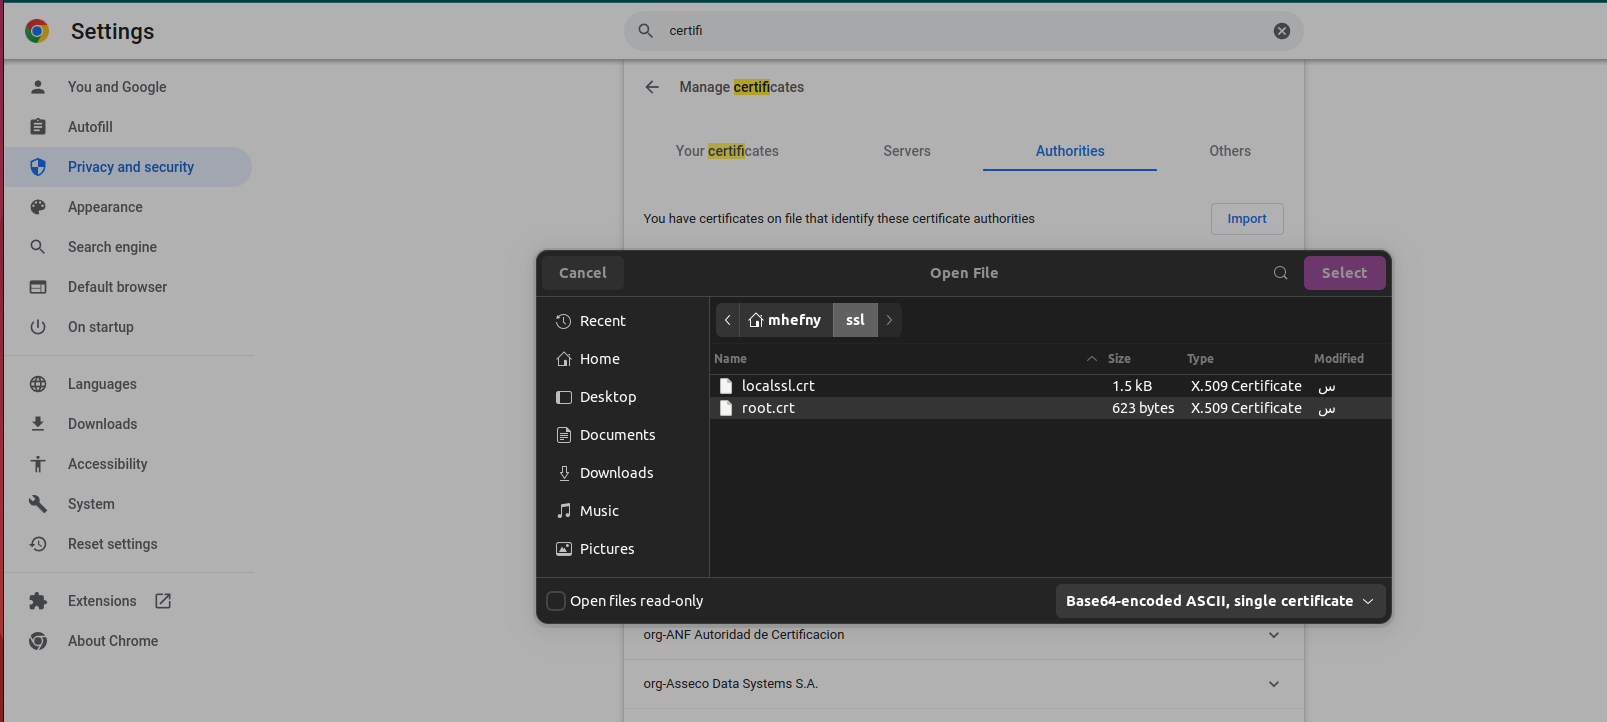
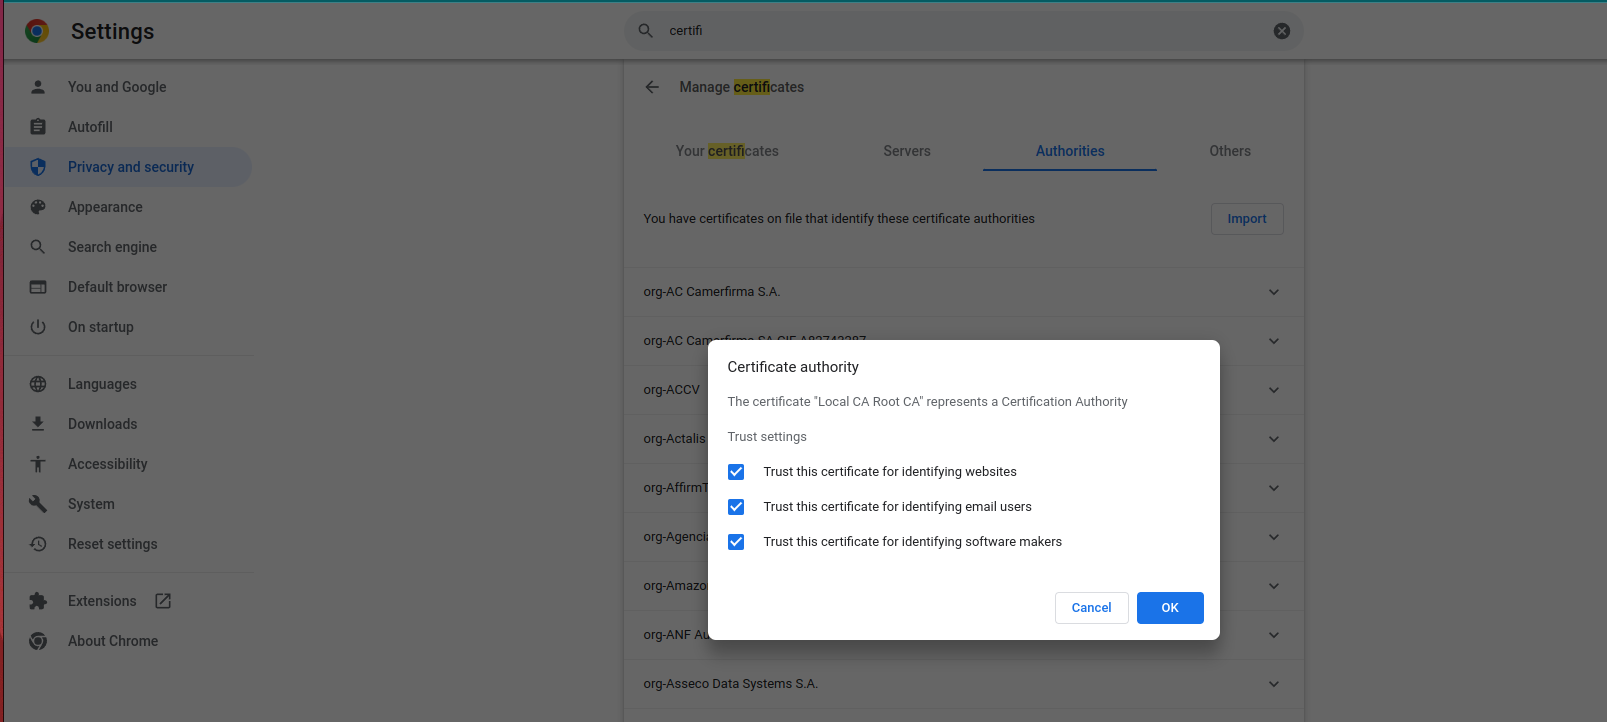
you need to copy root.crt into any browser of mobile device that is part of this system. This is a root certificate that is used to tell those devices that fullchain.pem is trusted and hence the conection will be secure and accepted.
The below images shows how to do that on Chrome .
Similar procedures need to be done on Android phones to be able to connect Andruav.
Important
The above ssl is used when you want an local trusted ssl certificate. If you want your server to be exposed to Internet you can create a truely valid ssl certificate from a trusted provider. And you need to have a static IP address not a local one.
- Andruav FIX
Because Andruav runs on a phone and the domain airgap.droneengage.com might not be recognized to it then you need to depend on ip to reach the server. On the RPI server you need to go to
cd ~/droneengage_server
nano ./server.config

- and edit
“public_host” : “airgap.droneengage.com”,
- to
“public_host” : “192.168.1.161”, // or whateverr IP of RPI Airgap server
- and
“allow_fake_SSL” : true, // should be TRUE
This public_host is used to by the mobile to access the Communication Server.
Important
You can download a full image from Air-Gap RPI-4 Ready Image